Tuesday 27 May 2014

Cob Loaf

Cheesy Cob Loaf Recipe

If you watch my April Favourites then you would of seen my rubbish description of my food favourite which is a Dipping Cob Loaf. I recently had this for the first time at my friends dinner party and I couldn't wait to make it for myself, I have adapted the recipe to make it my own. This dipping cob loaf is made for sharing so it is perfect for BBQ's or Dinner Parties. This recipe is really easy to make and trust me everyone will love this cob loaf!!


Ingredients

  • Cob Loaf
  • 250g Pancetta
  • 4 Chopped Spring Onions
  • 250g Cream Cheese
  • 1 1/2 Cups of Cream
  • 2 Cups of grated Mozzarella
  • 1 Cup of grated Cheese (cheddar) 
  • Crushed Black Pepper


 Firstly preheat the oven to 180oc, then start by finely chopping your spring onions, these are ones I've grown in the garden but any from a Supermarket will be great for this!

Next fry the Spring Onions and Pancetta on a medium heat for 5 minutes or until all the Pancetta is cooked and slightly crispy.

While the Pancetta and Spring Onions are frying carefully cut the top off your Cob Loaf.

Once you have cut the top off, put this to one side as you will need this later. Then scoop all the bread out and place in a bowl, you will also need this later for dipping into the sauce. My cob loaf was a Ploughman's loaf (cheese&onion) as this is all they had in the shops but any Cob Loaf will do.

Before you are about to make the sauce place your cob loaf in the oven for around 5-10 minutes, this will help to harden up the loaf and make sure no mixture will seep out of the loaf. Measure out and place your cream cheese, cream, mozzarella, cheese and pepper into a bowl. 

For the mixture I bought pre grated cheese as it seemed a lot easier for this recipe, you can do this or grate it yourself (I am just lazy). Also I used half fat cream cheese but you can use whatever cream cheese you like. Once all the ingredients are in a bowl then using a wooden spoon mix all of these together. 

After mixing well, add your pancetta and spring onions and mix well.

Take your cob loaf out of the oven and place all of your mixture until it fills up to the top ( my mixture did manage to fill 2 of these cob loafs). Then place the lids back on top of your loaves. 
You then want to wrap up your loaf with foil and place on a back tray and put in the oven for 45 minutes. 

After 45 minutes open up the foil and add the bread you originally scooped out of the loaves and place on the baking tray so that it crisps up. Put it back in the oven for another 10-15 minutes.

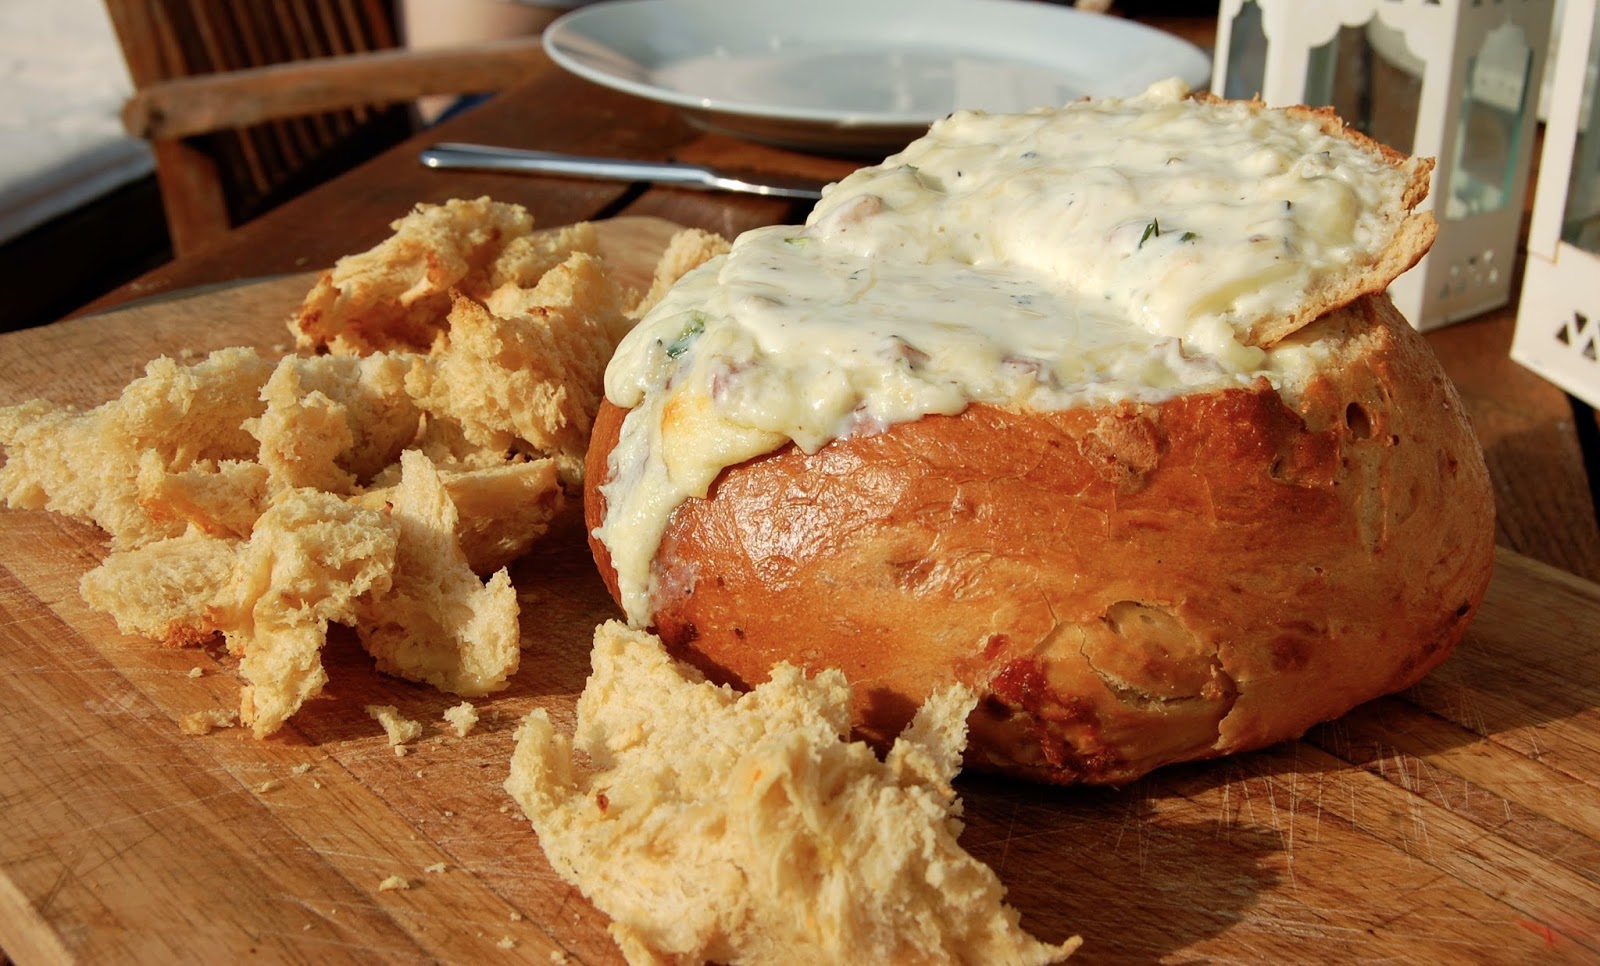
Ta-Dah, all you now need to do is place your loaf on a board take the lid off and let people enjoy your  yummy Dipping Cob Loaf!!

I hope you all enjoy making this as much as I did, it is so easy to make, I've added lots of photos so you can see how easy it is to make. I would love to know if you guys make it by tweeting me - @amybellebeauty or tag me on Instagram -amybellebeauty .

X


Tuesday 6 May 2014

Evening Makeup Tutorial


I've just uploaded my Evening Makeup tutorial on my YouTube channel-Amybellebeauty. This look is perfect for going out to a party, dinner or drinks and it's really adaptable so you can add a red lip or not use false lashes. I do apologise the camera setting has made my foundation look really dark, I promise it wasn't that dark in real life! Please go and subscribe to my channel here and like my videos!! Thanks for watching, also let me know if there are any looks you want me to create.
x

Monday 5 May 2014

Clean, clean, clean- Part 2

Cleaning your brushes using soap

Continuing on to my previous post here is a different way to clean your makeup brushes but by using hand soap.

This is the hand soap I am currently using, I think it has a really nice sent and doesn't leave my hands feeling dry. When I wash my makeup brushes if I am using hand soap I always use one which is anti-bacterial. 

To start I use around 2 pumps of soap depending on the size of the brush and also how dirty it is.
Then I work the soap into the bristles making sure you don't just apply soap to the top of the bristles because it is surprising how far the makeup does go. 
Once you have worked the soap into all the bristles and it has lathered wash all the soap out with warm water. I normally have to do this 2 or 3 times for my brushes to make sure all the stubborn makeup is removed.
Once you have removed all the makeup from your brush, make sure you keep the brush either vertical or lay flat. By doing this it will make sure that no water seeps into the glue and will make sure no bristles fall out and make your brushes last longer. I sometimes place mine in the airing cupboard to dry or leave them on a towel over night.

X


Clean, Clean, Clean- Part One

Cleaning your makeup brushes, Part One.


I put this photo up on Instagram asking if you would like me to show you different ways to clean your makeup brushes and lots of you were keen for me to do it, so here we go.  I have decided to post these in a series, I will show you 3 different ways to clean your makeup brushes. I will be the first to hold my hands up and admit that when I was younger I hardly ever cleaned my brushes. Since training to become a makeup artist I have learnt the importance of cleaning your brushes. It's not pleasant but your makeup brushes hold a lot of bacteria, if you have a blemish on your face and you use your brush on it then the bacteria will stay on the brush and spread spots. ( I know so gross). Cleaning your makeup brushes may improve your skin but it will definitely improve your makeup application and will help your makeup to look flawless. I wash my brushes as often as I can but I give them a deep clean every 2 weeks. 

Cleaning your brushes using shampoo

First start my applying shampoo to your brush, I apply my shampoo straight onto my brush and do not wet it before. I use either a baby shampoo because it is very mild or just my regular shampoo.
Then start to work all the shampoo into the bristles, making sure it starts to lather.

 In circular motions I then buff the shampoo onto my hands, this helps to work the shampoo into all the bristles and remove the stubborn makeup.
I then run my brush under warm water and make sure I get all the shampoo out. You may need to clean your sink after this too as it will be an interesting colour.

After the first wash my brush still has foundation in, I find the foundation gets stuck in the middle. If your's does this too then pump some shampoo straight into the middle and massage it really well. Repeat these steps as many time as you need to till your brushes are lovely and clean!!!

Look out for the next 2 posts to show you other ways to wash your brushes. Now who's off to go clean their brushes? 
X


Liz Earle, Cleanse & Polish

Miracle Bottle 


Meet my Miracle Skincare bottle, ok thats not actually it's name but it should be. This is the Liz Earle, Cleanse & Polish Kit, the size shown in the picture is the travel size bottle. In this little travel kit you get a 50ml size bottle and one muslin cloth, the other bottle I've got which I use every day is the Liz Earle 100ml Starter Kit which comes with 2 muslin cloths. I've read so many reviews about this product and wanted to try it myself. I'm very honest with my reviews and I don't get on with all skincare products, if you see my previous B Water skincare review you can see how I unfortunately  didn't get on with it. 

Firstly I love the bottle, it comes in a pump bottle so it's really easy to get the product out and the bottle stays clean. The smell is amazing, I love things that smell really organic and smell like essential oils and this definitely smells like that, it smells how I imagine a good skincare product should. The main ingredients are; Rosemary, Chamomile, Coco Butter and Eucalyptus, it has a slight tea tree smell which I think is from the Eucalyptus. I have combination/dry skin and am lucky that I don't tend to suffer from a lot of spots I just tend to get the odd breakout when the weathers changing or when I stop looking after my skin properly. 

I admit that before I used this  product I was a makeup wipe girl, but not any more I use this every night to remove my makeup and since doing it I have got so many compliments on how my skin is looking and thats all thanks to this amazing hot cloth cleanser. It has left my skin feeling really soft and has reduced the amount of spots I get, it's so easy to use but I don't tend to use it around my eye area cause I can find it to strong for my eyes. This is a must skincare product, so do go give it a try and I've been using mine for 3 months now and I still love it.

How I use mine

Step One

First I start of my taking about a 20 pence piece
amount of product and massage it into my skin
 making sure I avoid the eye area. I do know
 some people use this on their eyes but I prefer not to.


Step Two

I then take my Eve Taylor facial brush and carry on massaging the product into the skin. You can buy lots of different facial brushes this one is made out of rubber but you can buy soft bristle brushes too. By using a facial brush with this cleanser it helps to remove all the stubborn makeup and also exfoliates the skin and helps to get rid of all the dead skin cells.


Step Three

I then take my muslin cloth with warm water on and rub all the cleanser off my face making sure I remove all my makeup up to my hairline, in the eyebrows and down the neck if you bring your makeup down the neck.


I then hang my cloths to dry and wash the cloth I am using after using it 3 times.

X

Saturday 3 May 2014

Salute

Little Mix, Salute Video

Have you seen Little Mix's new Music Video that has just been released, it is called Salute and it is from their second album. I have been listening to their album for a while and couldn't wait for this video to come out because I was very intrigued to see what style it would be filmed in. 


I have to say I really like this video, it is shot in a very different style to their previous videos. This video has a more grown up, gothic and sexier feel. The video looks to me to be inspired by Beyonce's 'Run The World' video and also by Destiny's Child 'Loose my Breath'. This video and song definitely get's a thumbs up from me, it is all about Girl Power and shows that Little Mix are growing up as a band. Even though I feel this video does have a darker sexier feel than there previous videos I do still think their stylist hasn't made them look too old. They're still looking young and do not show too much skin. God I sound like an old woman!!

Adam Burrell


I follow Little Mix's makeup artist on both Twitter and Instagram and his work is amazing, he has worked on lots of the previous Little Mix videos and does all their makeup for shoots etc. I think the Girls makeup looks flawless in this video, they are all wearing similar makeup; with the eyes being a very dark bluey/black and all wearing a nude lip colour. What I love about Adam Burrell is he always writes a product list on his Little Mix photos and I find that so helpful and interesting. I have put some photos below of the some of the products he has used. If I was you I would definitely go follow him on Twitter and Instagram, he is an amazing makeup artist and you can find out what products he is using on the Girls!!


Thursday 1 May 2014

April Favourites


It's that time again everyone, Monthly Favourites time!! I hope you enjoy this video, please subscribe to my Youtube channel and comment on the video everything you have been loving this month!! 

X

3 for 2

3 for 2 in Boots....


If you are like me and love a good bargain now is the time to go buy your makeup. I always try and buy my makeup when they are on offer so I thought I'd let you know that Boots have a great offer on lots of cosmetics at the moment! One of my favourite brands; Maybelline  are on 3 for 2 , I am about to go stock up on my favourite Dream Satin Liquid Foundation and I'm going to try their more Pore Eraser called Baby Skin. Go buy your cosmetics while there on offer, I am!!